Sprite Rendering & the Sprite Editor
Sprites are the bread and butter of any 2D game. In this tutorial you will import a texture, slice it into sprites with the Sprite Editor, display it with a SpriteRenderer, and drive all of it from AngelScript — tinting, flipping, 9-slicing and swapping materials at runtime.
Textures and sprites
Comet makes a clear distinction between the two:
- A Texture is the image file you import (
.png,.jpg, ...). It owns GPU memory and sampling settings. - A Sprite is a rectangular region of a texture, plus rendering metadata: a pivot, a pixels-per-unit value and optional 9-slice borders. One texture can contain a single sprite or a whole sprite sheet.
When you drop an image into your project, select it in the Project panel and the Inspector shows its import settings:
| Setting | What it does |
|---|---|
| Texture Type | Sprite and UI for regular art, Normal Map for lighting relief maps. |
| Filter Type | No Filter (crisp pixel art), Bilinear or Trilinear (smooth scaling). |
| Wrap Mode | Repeat, Mirror Repeat, Clamp Edge or Clamp Border — how UVs outside 0–1 sample. |
| Pixels Per Unit | How many texture pixels equal one world unit. A 128 px sprite at 128 PPU is exactly 1 unit wide. |
| Modify Pixels | Keeps a CPU-side copy so scripts can call GetPixels() / SetPixelAt(). Costs memory — leave it off unless you need it. |
[!TIP] For pixel art, set Filter Type to
No Filterand pick a Pixels Per Unit that matches your tile size (for example 16). Your art will stay razor sharp at any zoom level.
Slicing with the Sprite Editor
With a texture selected, set its Texture Type to Sprite and UI and click Open Sprite Editor in the Inspector.
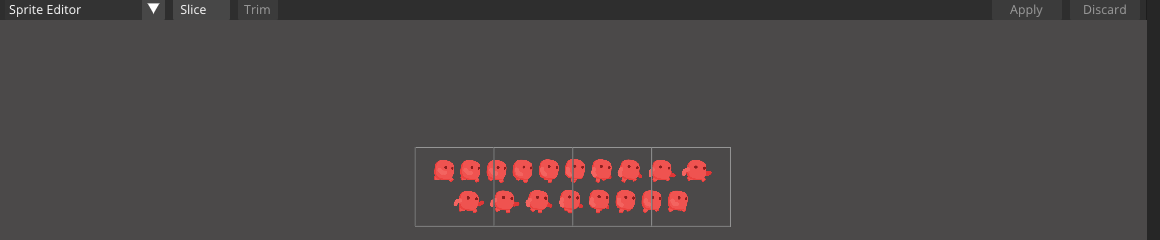
The Sprite Editor has four tools, selectable from its toolbar:
- Sprite Creation — draw and edit the sprite rectangles themselves.
- Secondary Textures — attach a normal map so 2D lights give your sprite relief.
- Physic Shape — author the collision polygon colliders will use for this sprite.
- Shadow Caster — author the occluder polygon used by 2D shadow casting.
Automatic and grid slicing
For sprite sheets you rarely slice by hand. Open the slicing options and choose a Slice Mode:
- Automatic — detects sprites from transparent gaps.
- Grid Size — cuts the sheet into cells of a fixed pixel size.
- Columns & Rows — cuts the sheet into an exact number of divisions.
Set the Pivot for the generated sprites (usually Middle, or Bottom for characters standing on the ground), optionally add an Offset and Padding between cells, enable Remove Empty Rects to skip blank cells, and press Apply Slice.
Manual editing, pivots and borders
Click anywhere on the texture to create a new sprite rect, then drag its corners to fit. For each sprite the Inspector shows:
- Rect — position and size in pixels.
- Pivot — the sprite's origin:
Middle,Bottom Left,Custom... Rotation and scaling happen around it. - Borders — left/right/top/bottom margins in pixels, drawn as green lines. These define the 9-slice regions used by the
SlicedandTiledrender modes below.
The SpriteRenderer component
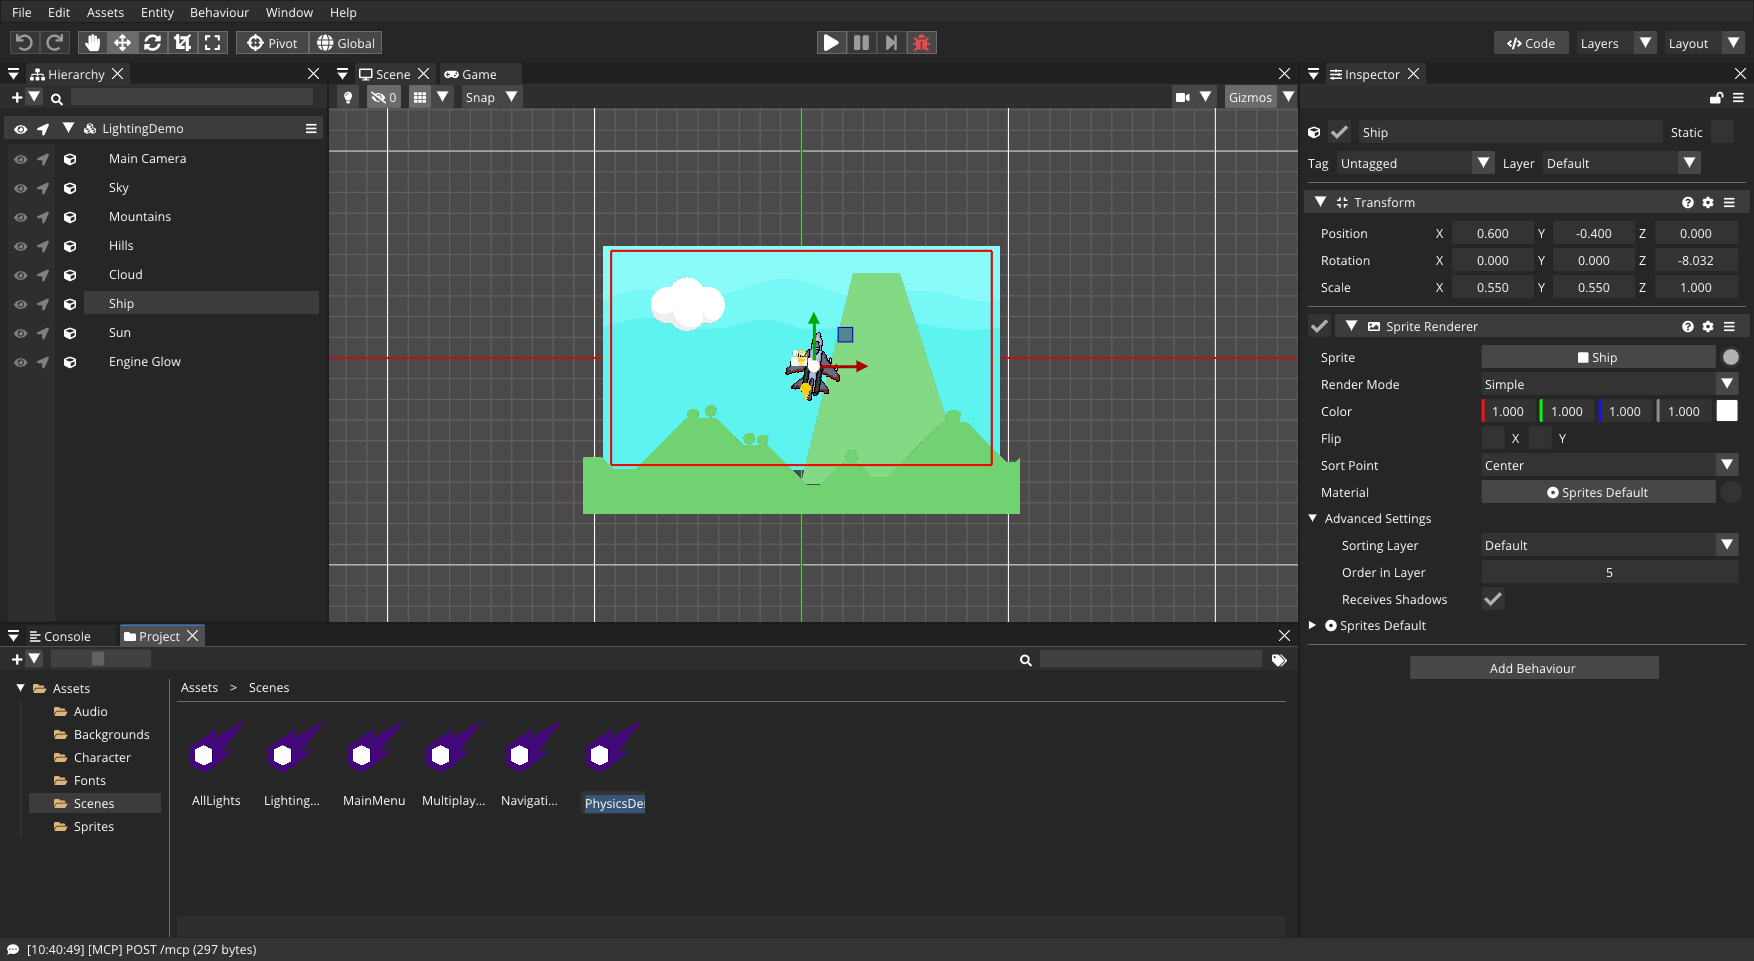
Add one with Add Behaviour → Sprite Renderer on any entity. Its Inspector properties:
| Property | Meaning |
|---|---|
| Sprite | The sprite to draw. |
| Render Mode | Simple, Sliced (9-slice) or Tiled. |
| Size | Target size in world units — only used by Sliced and Tiled. |
| Color | Tint multiplied over the sprite (white = unchanged). |
| Flip X / Flip Y | Mirror the sprite on each axis. |
| Sorting Layer | Which named layer this renderer draws in. |
| Order in Layer | Draw order within that layer — higher renders on top. |
| Sort Point | Sort by the sprite's Center or its Pivot. |
| Material | Optional custom material/shader. |
How sorting works
Comet renders sorting layers in the order they are defined in the project, and inside each layer sorts by Order in Layer. Two classic setups:
- Backgrounds on a
Backgroundlayer, gameplay onDefault, UI overlays on a front layer. - A top-down game where characters sort among trees: give everything the same layer and set Sort Point to
Pivotwith pivots at the feet.
9-slicing: Sliced and Tiled modes
If a sprite has Borders defined in the Sprite Editor, the Sliced render mode stretches only the center while corners keep their size — perfect for panels and buttons of any size. Tiled repeats the center instead of stretching it. In both cases the Size property controls the final world-space size:
using namespace CometEngine;

class PanelSetup : CometBehaviour
{
    void Start()
    {
        SpriteRenderer renderer = SpriteRenderer::Get(entity);
        renderer.renderMode = SpriteRenderMode::SLICED;
        renderer.size = Vector2(10.0F, 4.0F); // world units, borders stay crisp
    }
}
Controlling sprites from AngelScript
Every behaviour can grab the renderer on its entity with the static Get accessor. The pattern below is used all over the engine's sample project:
using namespace CometEngine;

class PlayerVisuals : CometBehaviour
{
    private SpriteRenderer spriteRenderer;

    void Start()
    {
        spriteRenderer = SpriteRenderer::Get(entity);
    }

    void Update()
    {
        // Face the direction we are moving.
        float moveX = Input::GetControllerAxisValue(ControllerAxis::LEFT, ControllerNumber::CONTROLLER_1).x;
        if (moveX != 0.0F)
        {
            spriteRenderer.flipX = moveX < 0.0F;
        }

        // Flash red while hurt.
        if (Input::GetKeyDown(KeyCode::H))
        {
            spriteRenderer.color = Color(1.0F, 0.25F, 0.25F, 1.0F);
        }
    }
}
[!NOTE]
SpriteRenderer::Get(entity)returns a reference to the behaviour attached to that entity — the same pattern works for every behaviour type (Camera::Get,Animator::Get, ...).
Materials: shared vs. instanced
Renderers expose two material properties with very different behaviour:
sharedMaterial— the material asset. Editing it changes every renderer that uses it.material— a per-renderer clone, created the first time you access it. Perfect for effects on a single entity, but you own its lifetime: callMaterial::Remove()when the entity is destroyed.
This dissolve effect from the Sandbox project animates a shader parameter on one sprite only:
using namespace CometEngine;

class Disolve : CometBehaviour
{
    private Material spriteMaterial;
    private float value = 0.0F;

    void Start()
    {
        // Accessing .material clones the shared material for this renderer only.
        spriteMaterial = SpriteRenderer::Get(entity).material;
    }

    void Update()
    {
        spriteMaterial.SetFloat("value", value);
        value += Time::GetDeltaTime();
    }

    void OnDestroy()
    {
        // Instanced materials are yours to clean up.
        Material::Remove(spriteMaterial);
    }
}
[!WARNING] Forgetting
Material::Remove()on an instanced material leaks it. If you only need to change the tint, prefer thecolorproperty — it does not clone anything.
Loading sprites at runtime
Everything you assign in the Inspector can also be loaded from code through RuntimeAssets. Paths are relative to your project's Assets/ folder, without extension:
using namespace CometEngine;

class RuntimeSpriteSwap : CometBehaviour
{
    void Start()
    {
        // Load a sprite atlas and pick a sprite from it by name.
        SpriteAtlas atlas = cast<SpriteAtlas>(
            RuntimeAssets::LoadResource("Atlases/Characters", ResourceType::SPRITE_ATLAS));

        if (atlas !is null)
        {
            SpriteRenderer::Get(entity).sprite = atlas.GetSprite("hero_idle_0");
        }
    }
}
For big assets prefer the asynchronous variant, RuntimeAssets::LoadResourceAsync(), which returns a ResourceAsyncOperation you can poll (isDone, progress, resource).
Quick frame animation: AnimatedSprite
When all you need is a looping flipbook — a torch, a coin, an idle loop — the AnimatedSprite behaviour replaces the sprite every frame for you, no state machine required:
using namespace CometEngine;

class TorchFlame : CometBehaviour
{
    void Start()
    {
        AnimatedSprite anim = AnimatedSprite::Get(entity);
        anim.speed = 12.0F;       // frames per second
        anim.loop = true;
        anim.randomStart = true;  // desync multiple torches
        anim.Play();
    }
}
The frame list is edited in the Inspector (or from code with AddSprite() / SetSprite()). For anything driven by game logic — walk/run/jump blending, transitions, events — use the full Animator instead: see the Animation & the Animator tutorial.
The other 2D renderers
| Behaviour | Use it for |
|---|---|
TextureRectRenderer |
Drawing a sub-rectangle of a texture directly (pixels or normalized UVs) without creating sprites. |
LineRenderer |
Polylines with a width curve and color gradient — lasers, ropes, debug paths. |
RenderTextureRenderer |
Displaying a RenderTexture that a camera renders into — minimaps, mirrors, picture-in-picture. |
All of them inherit the same sorting-layer, color and material properties from Renderer, so everything you learned above applies.
Where to go next
Your sprites are on screen — now light them up with 2D Lights & Shadows, or bring them to life with the Animator.