Tilemaps & Rule Tiles
Tile-based worlds — platformers, dungeons, strategy maps — are built from a Grid that defines the cell layout and a TilemapRenderer that paints tiles into those cells. Comet's tile system goes well beyond static sprites: animated tiles, position-seeded random tiles, and neighbour-aware rule tiles and auto-tiles that pick the right sprite automatically.
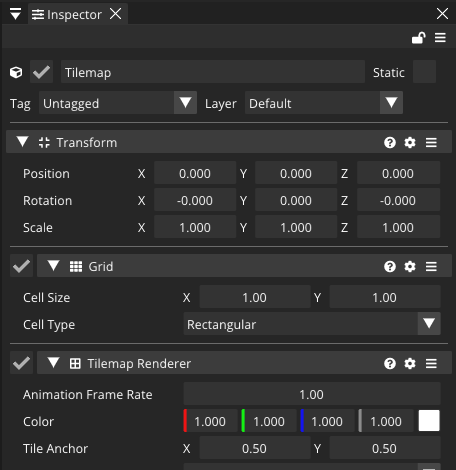
Grid + Tilemap Renderer
Two behaviours work together, both added from Add Behaviour:
- Grid — owns the cell geometry: Cell Size (world units per cell) and Cell Type (
Rectangular,Isometric,Hexagonal Flat,Hexagonal Pointed). It converts between world positions and integer cell coordinates. - Tilemap Renderer — a
Rendererthat stores which tile sits in each cell and draws them. It has the usual sorting-layer properties plus a global Animation Frame Rate for animated tiles and a Tile Anchor.
Cells are addressed with Vector2i integer coordinates. The renderer works on the Grid attached to the same entity.
Tiles are assets
A tile is not just a sprite — it's a tile asset (a .cometObject) that decides, per cell, which sprite to show, what colour and what collider to generate. Comet ships a whole hierarchy of tile types, all of which you can create as assets and extend:
| Tile type | What it does |
|---|---|
| Tile | A single fixed sprite. |
| Animated Tile | Cycles through several sprites at a speed. |
| Random Tile | Picks a sprite per cell from a position-seeded hash (stable across reloads). |
| Weighted Random Tile | Like Random, but with per-sprite probabilities. |
| Pipeline Tile | Chooses a sprite from its 4 orthogonal neighbours — pipes, wires, walls. |
| Auto Tile | 2×2 or 3×3 bitmask autotiling — the classic ~47-sprite terrain system. |
| Rule Tile | The most flexible: a list of rules matching neighbour cells, with rotation/mirror transforms. |
Isometric and hexagonal variants of Rule Tile exist too (Isometric Rule Tile, Hexagonal Rule Tile).
Painting from AngelScript
Grab the renderer and set tiles by cell. null erases:
using namespace CometEngine;
using namespace CometEngine::Tilemaps;

class LevelBuilder : CometBehaviour
{
    TileBase groundTile;   // assign a tile asset in the Inspector

    void Start()
    {
        Grid grid = Grid::Get(entity);
        TilemapRenderer tilemap = TilemapRenderer::Get(entity);

        // Lay a 20x3 floor.
        array<Vector2i> cells;
        array<TileBase> tiles;
        for (int x = 0; x < 20; x++)
        {
            for (int y = 0; y < 3; y++)
            {
                cells.insertLast(Vector2i(x, y));
                tiles.insertLast(groundTile);
            }
        }
        tilemap.SetTiles(cells, tiles);

        // Query and erase.
        if (tilemap.HasTile(Vector2i(5, 2)))
        {
            tilemap.SetTile(Vector2i(5, 2), null);
        }

        // World <-> cell conversion.
        Vector2i cellUnderMouse = grid.WorldPositionToCellPosition(Vector2(3.5F, 1.2F));
        Vector2 cellCentre = grid.CellPositionToWorldPosition(cellUnderMouse);
    }
}
Key TilemapRenderer calls: SetTile(cell, tile), SetTiles(cells, tiles), GetTile(cell), HasTile(cell), SetColor(cell, color), RefreshTile(cell), RefreshAllTiles(), ClearAllTiles().
[!TIP]
SetTiles()(plural) applies a whole batch in one call and is much faster than loopingSetTile()when you generate a level procedurally.
Creating tiles
Tiles come from your sprite art. The fastest path — and the one that creates the tile assets for you:
- Import and slice your tileset. Drop a spritesheet in, set its Texture Type to
Sprite and UI, and slice it into individual sprites in the Sprite Editor (grid slicing is ideal for a tileset). - Open the Tile Palette panel (
Window → Tile Palette) and create a palette — give it a name and a cell size matching your tiles. - Drag the sliced spritesheet onto the palette. The panel literally invites you to "Drag Spritesheet, Sprite or a Tile here" — drop it and Comet auto-creates a simple
Tileasset for every sprite and lays them out in the palette. That's your tile set, created in one gesture.
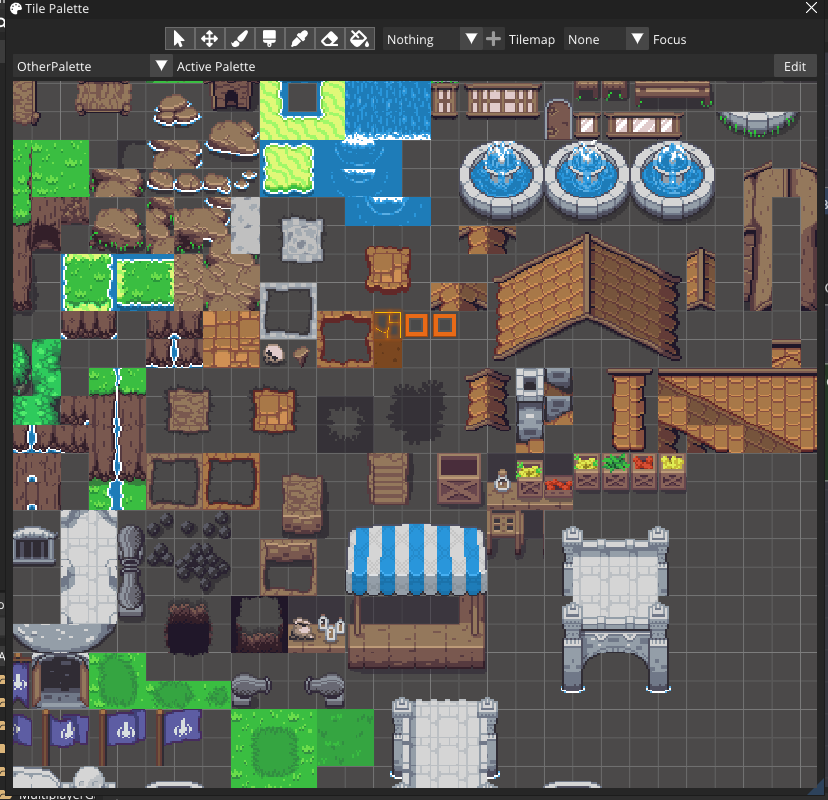
Smarter tiles
For tiles with behaviour, create the tile asset explicitly from the Project panel's create menu, then drag it into the palette:
- Animated Tile — hand it a list of sprites and a speed.
- Random / Weighted Random Tile — give it several sprites; each cell picks one (stably, seeded by position).
- Auto Tile — supply the 16 (2×2) or ~47 (3×3) mask sprites and it picks the right edge/corner piece from its neighbours automatically.
- Rule Tile — the most powerful. Its inspector shows a 3×3 rule grid: click a neighbour cell to require it be the same tile (green), a different tile (red), or don't-care (grey), and click the center to cycle a rotation/mirror transform so one rule covers several orientations. Add rules top to bottom — the first rule that matches a cell's neighbours wins.
Painting a tilemap
With a palette ready and a tilemap entity in the scene (a Grid + Tilemap Renderer):
- Pick a tile in the Tile Palette panel.
- Choose a tool from the palette toolbar — Brush (single cells), Box Brush (drag a rectangle), Fill (flood-fill an area), Picker (eyedrop a tile already in the map) or Rubber (erase).
- Paint into the scene. A grid overlay snaps to cells; drag to lay down tiles.
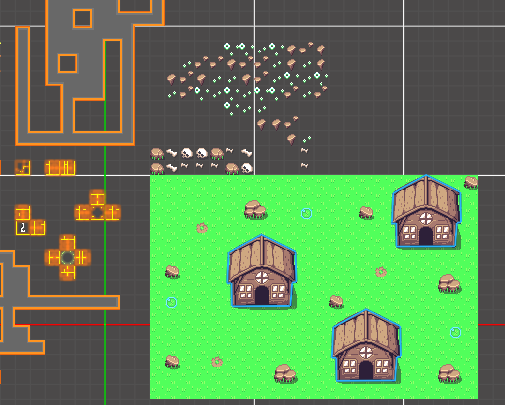
Rule tiles and auto-tiles update themselves as you paint — lay a strip of wall and the corners and edges resolve automatically.
Physics: the Tilemap Collider
Add a Tilemap Collider and the solid tiles automatically get collision. Each tile asset declares its collider type — Sprite (outline of the sprite), Grid (full cell) or None — so decorative tiles stay walk-through while walls block. Query it from code with HasColliderAt(x, y).
Writing a custom scripted tile
Because tiles are script classes, you can author your own by extending TileBase (or TileSingle) and overriding the info callbacks:
using namespace CometEngine;
using namespace CometEngine::Tilemaps;

class GlowTile : TileSingle
{
    Sprite baseSprite;
    float glow = 0.5F;

    void OnGetTileInfo(const Vector3i &in position, TilemapRenderer tilemap, TileInfo tileInfo)
    {
        TileSingle::OnGetTileInfo(position, tilemap, tileInfo);
        tileInfo.sprite = baseSprite;
        tileInfo.color = Color(1.0F, 1.0F, 1.0F, 1.0F) * glow;
    }
}
OnGetTileInfo fills a TileInfo (sprite, color, collider type, offset/rotation/scale) for each cell; RefreshTile lets neighbour-aware tiles react when an adjacent cell changes. This is exactly how the built-in Rule and Auto tiles are implemented.
[!NOTE] Random, Weighted-Random and Auto tiles seed their choice from the cell position, not a live RNG — so a given cell always shows the same sprite across save/reload, which is what you want for a stable-looking world.
Where to go next
Give your tiled level depth with 2D Lights & Shadows, collide with it using Physics, or let enemies path across it with Navigation.